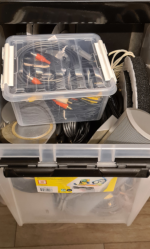
On the right, an image of the box of speakers and other obsolete hifi equipment you have stored, just waiting, longing for this opportune time to be used.
A picture says more than a thousand words, therefore a video …
Short video on use, show spotify connect and radio with MPD via HomeAssistant
“Snapcast is a multiroom client-server audio player, where all clients are time synchronized with the server to play perfectly synced audio. It’s not a standalone player, but an extension that turns your existing audio player into a Sonos-like multiroom solution.".
Snapcast will be the main star in our setup here, and it consists of two parts. A Snapserver, and a Snapclient which will run on all of the places you want sound to play.
Both the server, and the client are able to run on all kinds of platforms, this includes smartphones, so here you might finally have a use for those dusty Android-phones you’ve horded over the decade. We will be using the Debian build here later.
Librespot (Spotify Connect), Airplay, PulseAudio, oh the possibilities..
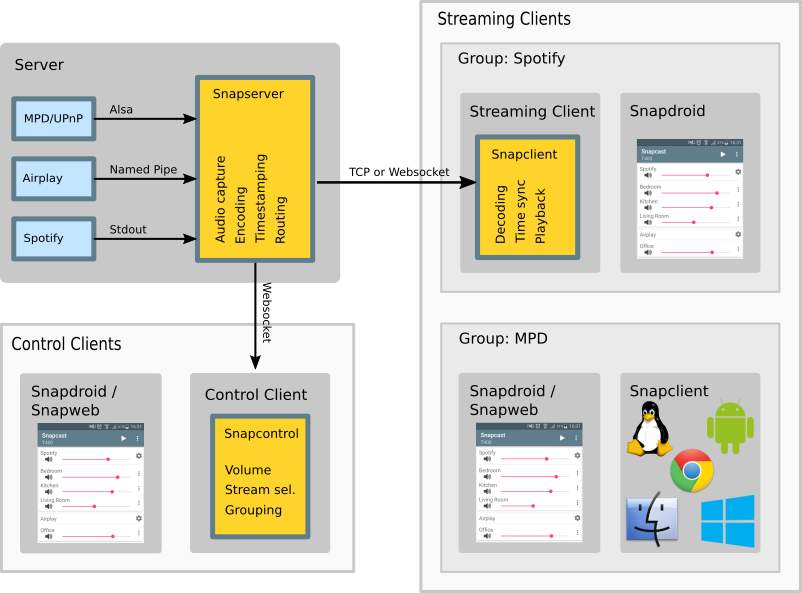
The best thing about Snapcast is that it’s build to be extremely modular, allowing it to be configured to adapt to whatever usecase you’ll like to throw at it. The following figure from Snapcast’s readme does a good job in illustrating this:
We can use Spotify Connect to allow anyone within the household to play music on our device, Airplay for Apple users and use PulseAudio to stream audio for Linux users. This also supports anything that can play audio locally, so the possibilities for what you can play or stream to your speakers are virtually limitless.
My setup
I have Snapcast clients in four rooms of my apartment now, with two main sources to play from.
Red = Controllers, Green=Players, Yellow=Sources, Blue=Clients/Audio outputs
My Snapserver runs on Ubuntu Server 20.04 as a LXC container under Proxmox. The container is designated 15GB disk, 1 CPU (i5-2500k) core, 1GB memory and runs without a hitch.
The Snapclients all run different hardware, Hobby/Bed/Patio runs on a Raspberry Pi 2, 3 and 4 while the livingroom client runs alongside Kodi on a Intel NUC HTPC.
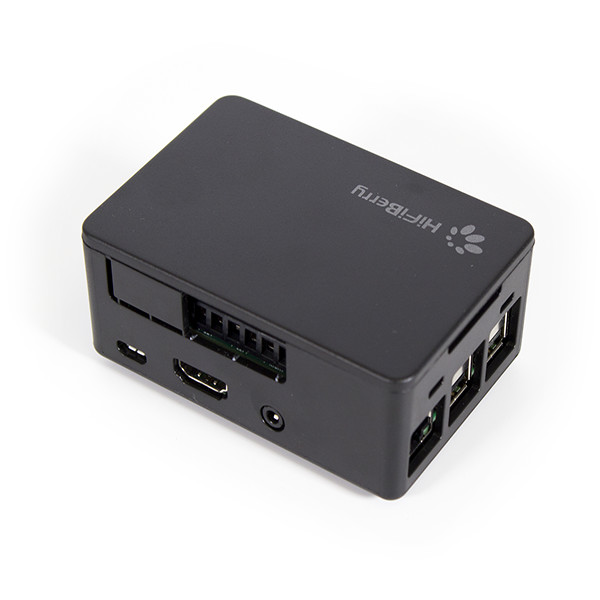
As for sound hardware, I used whatever I had in the room already. For the rooms that didn’t have any audio gear I invested in a HifiBerry AMP2.
HifiBerry AMP2
… and finally a use for the cheap yardsale speakers you got stashed somewhere, the ones you picked up years ago because you just could not let them go
The HifiBerry AMP2 is a audio amplifier HAT for the Raspberry Pi which allows you to connect speakers directly and adjust the amplified volume via Snapcast/ALSA.
I’ve been using the AMP2 for two of my Snapclient’s, and the experience with it has been excellent. Highly recommend it if you are looking for a amplifier to use with a small form factor, but still having enough power to fill a room with sound.
Basic Snapcast installation
Got you convinced? Here’s some installation notes I made when configuring my own setup that might be of help.
I assume that you already have somewhere you want to run the Snapserver, as well as one or more devices with working audio capabilities for where you want to install your Snapclients.
Snapserver
Installing the Snapserver is as easy as downloading and installing a package for most platforms.
The install.md document explains how you do this for several different distributions.
For me, as Ubuntu Server is Debian-based, all I had to do was to find the latest release at snapcast/releases and downloading the snapserver_XXXX_amd64.deb file to my server. The following commands then installed the package, and enabled it to start at boot (note that the filename here is for the 0.26 release, which might not be the most recent when you read this).
When installed, you get two configuration files to play with. The first one under /etc/default/snapserver should look like this:
START_SNAPSERVER=true
SNAPSERVER_OPTS=""
While the second one, /etc/snapserver.conf is where we place all our sources. To start simple, just to see if our server works we can place a single file as a source for now, see the stream section below:
Then to download a sample file to play, and to start our Snapserver we can do the following.
wget https://whynot.guide/a2002011001-e02.wav -O /opt/a2002011001-e02.wav
systemctl restart snapserver

# We'll check the status too, just to see if everything went OK
systemctl status snapserver
You should now be able to browse to http://<snapserver host>:1780 to see a simple control panel for our Snapserver, here you can select which source to play and choose the volume that we soon will hear the sound in.
Snapclient
To actually hear the fabulous tunes we are playing, we need to setup our first Snapclient. On whichever machine you want to play the music from, we do more or less the same as we did with the Snapserver, except that we are downloading and installing the Snapclient instead.
So again, consult the install.md document to see how you do this for the different distributions.
If we are running a Raspbian on RaspberryPi, then it’s as easy as pulling the latest snapclient release at snapcast/releases and downloading the snapclient_XXXX_armhf.deb file
To configure our snapclient with the default audio settings, all we need to do is to add the address to our Snapserver in /etc/default/snapclient, as an example:
If your setup requires that audio is output somewhere else than the system’s default, then see the readme.md for how to configure that. More options for configuring the snapclient can also be found with man snapclient.
When done configuring, lets start it up to see if we got any sound:
systemctl restart snapclient

# We'll check the status too, just to see if everything went OK
systemctl status snapclient
Troubleshooting
If you got no sound playing, then check the following:
See if there are any errors present on the Snapserver by running journalctl -eu snapserver
… and on the Snapclient by running journalctl -eu snapclient
Check if the Snapclient appears in http://<snapserver host>:1780, if it doesn’t then ensure that it’s running and that you did not write the address in /etc/default/snapclient wrong.
Check that the “test” source is selected, and that the Snapclient is in the group that plays it. Ensure that the volume is set high enough.
Test if you can play audio at all from the Snapclient machine, you can use the same testfile from before:
	wget https://whynot.guide/a2002011001-e02.wav
	aplay a2002011001-e02.wav

	# If you get no sound, check that the output device is not muted in alsamixer
	alsamixer
Use Snapdroid (mentioned below) to test if you get audio there
If all else fail, send me a mail on andreas@whynot.guide, and I’ll see if I can help you (no promises)
Librespot (Spotify Connect)
NB! This only works if you have Spotify Premium!
Okay, so we got a looping wav-file to play. What about Spotify?
Well, here comes the “for tinkerers” part more into play. As librespot is not packaged for most distributions (not in the default repos for Ubuntu at the time of writing), we need to compile it ourselves.
First part is getting Rust installed, for details see the part on Installing Rust here, but in essence you need to do the following.
curl --proto '=https' --tlsv1.2 -sSf https://sh.rustup.rs | sh
rustup update
Now that we got Rust, we can look at librespot’s COMPILING.md, boiled down we need to:
apt install git build-essential libasound2-dev pkg-config
# Note: libasound2-dev & pkg-config is not strictly needed for use with Snapcast, but it's nice to have if we have to troubleshoot.

git clone https://github.com/librespot-org/librespot.git
cd librespot
cargo build --release
cp target/release/librespot /usr/bin/
Then, to configure our Snapserver to use our freshly compiled librespot we need to open up our /etc/snapserver.conf file again, and add another stream = line as documented in configuration.md. If we are building upon our example from before, then it would look something like this, note the stream = spotify://... line. Replace YOUR_SPOTIFY_USERNAME and YOUR_SPOTIFY_PASSWORD with your actual Spotify credentials.
Run systemctl restart snapserver, and it should now have Spotify support.
Navigate to http://<snapserver host>:1780 to select Spotify as a source. In the Spotify app on your phone or PC, select Snapcast and play a song.
You should now hear the song playing on your Snapclient device!
Snapdroid
Snapdroid is a “Snapcast control client and player for Android”, which is a great tool for both controlling and troubleshooting your Snapcast setup.
It’s as easy as downloading from the Play Store, and entering the IP for your Snapserver.
By clicking the Play icon in the top right corner, you can use your phone as a Snapclient too, which is both handy as a troubleshooting tool and as a way to play music in any room you haven’t gotten around to setting up any speakers (yet).
MPD and Mopidy
You can of course use any local playing sources with Snapcast, MPD and Mopidy are great examples.
If you are not familiar with the two,
“Music Player Daemon (MPD) is a flexible, powerful, server-side application for playing music. Through plugins and libraries it can play a variety of sound files while being controlled by its network protocol."
“Mopidy plays music from local disk, Spotify, SoundCloud, TuneIn, and more. You can edit the playlist from any phone, tablet, or computer using a variety of MPD and web clients. “
In my experience, MPD is more old-school and stable, while Mopidy is more modern and feature-rich. Any of them are perfect if you have a local file collection of music you want to make available to play, or extend your Snapcast with support for tons of other audio services.
I used Mopidy for allowing guests to queue up Spotify songs to play, but now that the “Group Session” mode was introduced in the Spotify app I haven’t used it for a while. However, it worked great while it lasted. I tried using Mopidy for radio through the Mopidy-Stream extension, but I had issues with the stability on Mopidy-MPD which I used to control it.
As I no longer had the need for the Spotify extension I decided to simplify things and depreciate Mopidy in favor of just using MPD. I’ve since used MPD every morning for playing radio through Snapcast.
Setting up MPD for playing internet radio through Snapcast
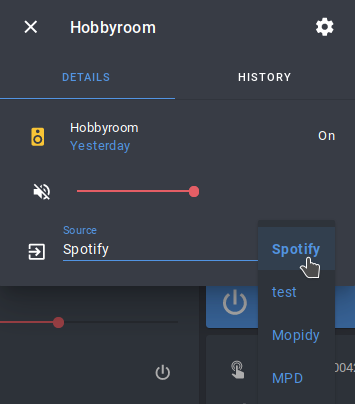
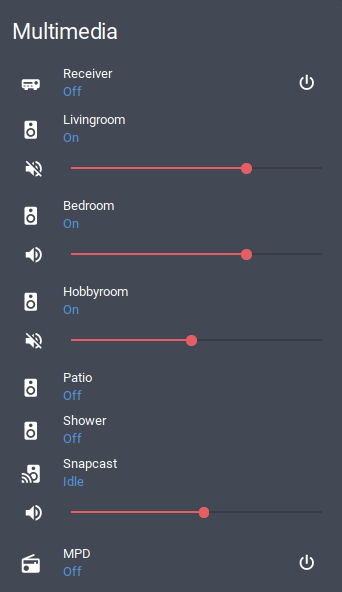
And, to easily control it all in one place we have Home Assistant. Here we can add integrations for Snapcast, MPD (which also covers Mopidy), Spotify Connect, and much more.
If you haven’t installed Home Assistant already I highly recommend it, as it’s a great “single-pane-of-glass” for all kinds of in-house things, even if you’re not in to the whole IoT-hype. Installing Home Assistant itself is a bit out of scope for this post, and is already done much better than I could by others anyway. However, Snapcast and all services connected works great without Home Assistant too, you just have more controllers/interfaces to care for.
To add the controls for the different services, I refer to the excellent documentation over at home-assistant.io/integrations.
One of the great benefits with using Home Assistant to control this is that we have a much easier time automating it!
With a few basic automation rules, you can automate your music to your heart’s content.
For inspiration, I’ve hooked this together with Tasker on Android such that it automatically starts my radio, and gently increases the volume until my alarm goes off. If you want to know how, I’ll explain it in details in the next post, this one is already long enough :)
Other fun ideas
Automatically mute audio in the room when in a phone-call
Implementing this with some kind of room presence detection, allowing Snapcast to automatically move the audio after where there are people
Conclusion
I’ve been running this setup for a couple of years now, and Snapcast have been rock stable. If you didn’t get terrified by the installation instructions I highly recommend this instead of Sonos, or any of the other solutions on the market now. It works great, sounds great, and has for me been something that I’ve set up once and since have just worked.
The only downside I’ve found with Snapcast is that there is no donate-button for supporting badaix’s fantastic work anywhere.
In the end, Snapcast has awakened a new joy in audio-tinkering for me again, simply by being fun and flexible enough to allow ideas to become reality. Between all the boring and often lackluster “all-in-one” audio devices out there, Snapcast is the modern form of the “old-school” receiver. I look forward to the next room, source, or automation I’ll add.

 … and finally a use for the cheap yardsale speakers you got stashed somewhere, the ones you picked up years ago because you just could not let them go
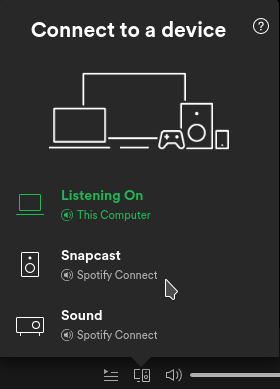 Run
Run 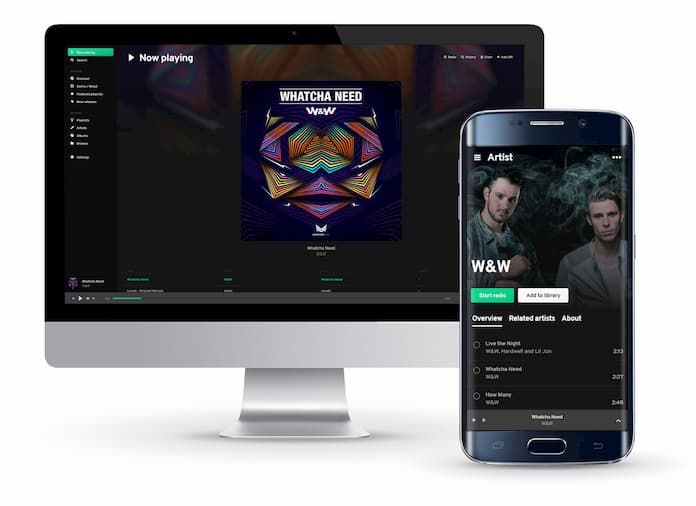
 And, to easily control it all in one place we have Home Assistant. Here we can add integrations for Snapcast, MPD (which also covers Mopidy), Spotify Connect, and much more.